
CLI使用
使用
CLI使用之前,需要已经安装好CLI工具和SyberOS SDK
创建项目
使用命令创建模板项目
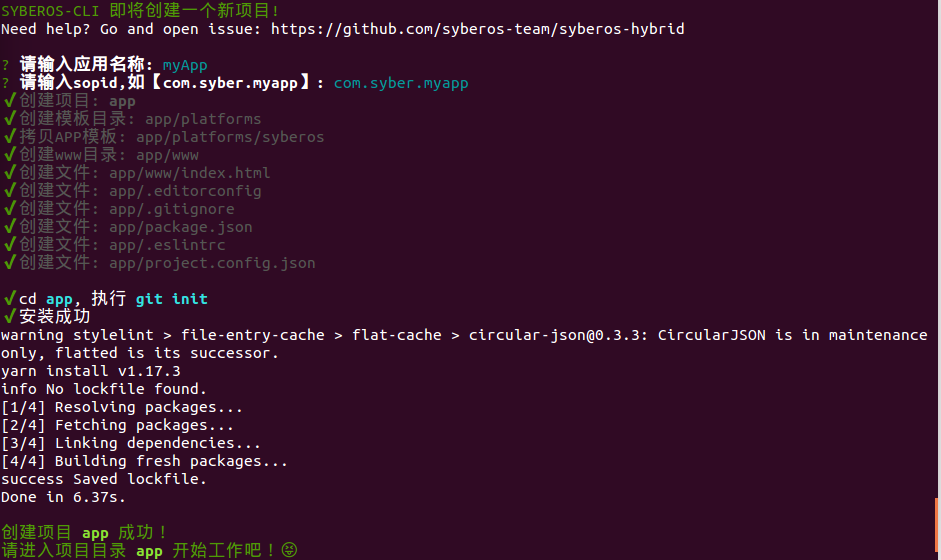
$ syberh init myApp
在创建完项目之后,会默认开始安装项目所需要的依赖,安装使用的工具按照 yarn>cnpm>npm 顺序进行检测,一般来说,依赖安装会比较顺利,但某些情况下可能会安装失败,这时候你可以在项目目录下自己使用安装命令进行安装,如
# 使用 yarn 安装依赖
$ yarn
进入项目目录开始开发
目前暂无对前端开发工具进行限制,但是建议使用
vs code进行代码开发,后续我们也会提供vs code相关插件使得可以更好的运行调试
编译打包
开发过程中可以使用真机或者模拟器运行应用
$ cd 项目目录
# 调试模式运行于真机
$ yarn run dev:device
# 调试模式运行于模拟器
$ yarn run dev:simulator
# 运行于真机
$ yarn run build:device
# 运行于模拟器
$ yarn run build:simulator
# 只打包不运行
$ yarn run build
更新
Syberh 提供了更新命令来更新 CLI 工具自身和 升级到最新的core
更新 Syberh CLI 工具
#syberh
$ syberh update self
# npm
$ npm i -g @syberos/cli@latest
# yarn
$ yarn global add @syberos/cli@latest
更新项目中 Syberh 相关的依赖
$ syberh update project
环境及依赖检测
Syberh 提供了命令来一键检测 Syberh 环境及依赖的版本等信息,方便大家查看项目的环境及依赖,排查环境问题。
Syberh Doctor
Syberh Doctor 就像一个医生一样,可以诊断项目的依赖、设置、结构,以及代码的规范是否存在问题,并尝试给出解决方案。
只需要在终端运行命令:syberh doctor:
$ syberh doctor
API 列表
init [projectName]
初始化项目
| 参数 | 描述 |
|---|---|
| --description [description] | 项目介绍 |
| --example | 创建示例项目 |
# 初始化项目
$ syberh init myapp
# 创建示例项目
$ syberh init --example
build
打包运行项目
| 参数 | 描述 |
|---|---|
| --type [typeName] | 运行编译类型,device:真机 simulator:模拟器 |
| --debug | debug模式运行,支持热更新 |
| --target [targetName] | 重置target,device:真机 simulator:模拟器 |
| --env [env] | Env type |
| --port [port] | Specified port |
# 打包并跑在真机上
$ syberh build --type device
# debug模式,打包并跑在真机上
$ syberh build --type device --debug
update
更新cli工具或者更新核心文件
| 参数 | 描述 |
|---|---|
| self | 更新cli工具 |
| project | 更新当前项目核心文件 |
$ syberh update self
doctor
快速检查用户本地开发环境
| 参数 | 描述 |
|---|---|
| --global | 检查全局环境 |
$ syberh doctor
# 检查全局环境
$ syberh doctor --global
simulator
启动模拟器
$ syberh simulator
install
通过命令行模式安装sdk和target
$ syberh install